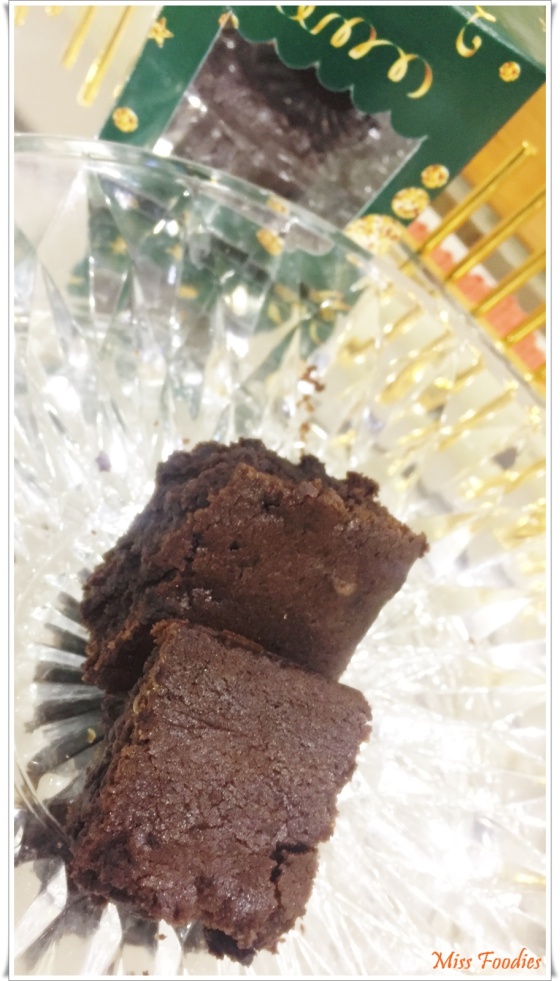
Whole Wheat Eggless Chocolate Chip Cookies

Hello friends. Hope you all are keeping safe. The times are surely tough but let us stay strong and calm. This shall pass. To cheer you all up we have got this mini celebrations of the youngest member of our miss foodie family. Yes it is kiyan’s first birthday and we cant keep calm. Parul’s little one …. welcome to the foodie group.

Let kids shape up their own cookies like mine did 🙂

It is a super easy recipe and surely you will find all ingredients at home. Goodness of whole wheat makes it healthy for kids and definitely satiating. If you got a sweet tooth like us and your little munchkins get in the kitchen and try these on.

So here it is:

METHOD

1.Mix together flour, baking soda and salt in a bowl. Set aside
2.To another bowl, add in softened butter. It must be soft but cold and when pressed down with
a finger it must dent.
3. Whisk it just for 30 sec. Then add regular sugar and brown sugar. Cream until light and fluffy for
about 1 to 2 mins. Do not over beat, butter begins to melt.
4. Add in vanilla and mix.

Making dough
1. Now add in flour to the creamed butter and sugar. Mix well just until combined to form a non
sticky dough.
2. If the dough turns sticky add in 1 tsp flour and mix. If the dough is dry add 1 tsp milk and mix
well.

Baking eggless chocolate chip cookies
1. Cover and chill the dough in refrigerator for 15 to 30 mins.
2. Meanwhile preheat the oven to 180 C for about 15 mins.
3. Divide the the dough into equal parts and place them on the tray lined with parchment paper.
4. Bake for 9 to 10 mins. Remove when the edges begin to turn slightly brown. The cookies will
still bake on the tray after removing from the oven. So remove them a bit early.
5. Cool completely on a wire rack and store them in air tight containers for 7 days.

Hope this post helps you cheer up in these uncertain times. Let’s celebrate and cherish what we have. Let’s cook , eat and keep tensions at bay.

Happy Happy Birthday Kiyan!!!

Loads of love

Sakshi n Parul

Chocolate Brownie – Happy Valentine’s Day :)

These Homemade Eggless Chocolate Brownies are here to make vegetarian brownie lovers happy and to make those dessert parties more inclusive! They are super easy to pull together, are cakey and fudgy!

Everyone loves chocolate brownies- they’re comforting, delicious and well, chocolaty! These fudgy chocolate brownies are your chocolate dreams come true. The fudgy texture of these brownies, the flaky layer on top and the rich intense flavor make this recipe a total winner. It is an absolutely no-fuss recipe that is very simple to make.

So before you guys go away for partying or celebrating this day, just take a look at these fudgy, cakey, chocolatey homemade eggless brownies and tell us if you can walk away from this deliciousness.

Take a look:


All we wondered was that how come we have never posted brownies. These yummy in our tummy bites will make your loved ones feel special.


Cheers!!!

Parul n Sakshi


Apple Crumble Sundae

                      Happy Happy six months Kiyan 🙂

6 months already!!! Woooohoooo!! Our new member in the missfoodie family is growing up fast. Yes indeed as Sakshi introduced you in the last post to our little Kiyan. So heres our yummylicious as our adorable little munchkin. It is amazingly satiating Apple Crumble Sundae. It is easy to make and assemble. And yes big thank you to my nieces who helped me get back to blog from the usual routine.

So let’s get started:

This one is just perfect for your guests. Best part is you may make it quick and let the kiddos do the assembling. Trust us It will be fun for them.

It is perfect for your sweet tooth 😉 Easy to work with kiddos also. This will surely help you get them at work specially when they know they get to eat it all by themselves.

Don’t wait up. Start making.

Stay connected!!!

Cheers

Parul n Sakshi

CHOCOLATE TRUFFLES


Happy Lohri everyone. So yes finallyyyyyyy. Here we are. We know its been too long but here we are back in action and with a good news. Let us introduce to our little member Kiyan, Parul’s baby boy or should I say Nyra’s baby brother. So you would know why we have been busy. I am going crazy with twins schools and all.

But we have got some absolutely yummy and easy chocolate truffles. Its a treat for you and your kiddos. We would like to dedicate this blog to Parul’s nieces. Thanks to them for getting our blog to life. So they came over to stay at Parul’s and got this super amazing Vikas Khanna cook book. So they made some awesome stuff which we are going to keep posting now and then. I am impressed with the team work and so will you be.

So lets get started for this yummy treat and perfect for this festival 🙂

Foodie friends dont keep waiting. Just start making. Trust us they are super tasty. The pics may not look so fascinating because not much to do with them. But they will melt in your mouth and definately you will not be able to stop at one.

Have fun

Stay foodie for more posts

lots of love

Sakshi and Parul

Tri-Colour Sooji Idli | Independence Day Special

Remembering once again this sweet creation by Parul. 15th August is a special day for us. It remarks the celebration of our freedom, our Independence. Let’s celebrate this day with utmost respect and gratitude. Here wishing each one of you a very Happy Independence Day.

Since we talk everything in terms of food, so do our kids now. This one comes on our menu because of them. As my little bundles had to carry this for their school celebrations we tried our hands on this one.  We thought why not make something special for Independence Day. Let’s make a very easy and quick recipe using tri-colours representing our National Flag and celebrate the freedom 🙂

This is a quick, easy and fun recipe. If you are fond of Idli, but don’t have the time to prepare the batter, this recipe is perfect for you. This is a normal Sooji Idli recipe but with a little twist. Perfect tiffin recipe for your kids or you can have it as an evening snack with a cup of tea. You may use microwave or make in normal Idli stand.

Let’s get into this colourful recipe! 😉

  INGREDIENTS

  • 2 cups Sooji Rava Semolina
  • 1 cup curd
  • 1 cup water
  • 1 packet eno salt / fruit
  • 1 /8 teaspoon citric acid {optional}
  • 3 teaspoons  oil
  • 1 tablespoon greasing Oil for and tadka
  • 1 teaspoon mustard seed
  • 2 – 3 tablespoons coriander chutney green
  • 1/2 tea spoon Orange spoon food colour, 1 grated carrot
  • 1/4 tea spoon green food colour.
  For Green Chutney
  • a bunch coriander leaves
  • 1 tablespoon ginger
  • 2 chilies green
  • to taste salt
  • lemon juice
  • 1/2 teaspoon cumin seeds

METHOD

In a deep mixing bowl. Take sooji, curd and water. Mix it well using a spoon.

Now add citric acid {this is optional- if curd is sour enough, don’t add this}, salt and oil into the same mixture of sooji and curd. Mix all of these together.

This is the main batter and we will leave it to rest for about 20 minutes.
After the batter has been rested, again add 1/2 cup water or as required. We want a semi thick consistency.
Since we are making tri-colour Idli, divide the batter into 3 parts as shown below. Divide equally using a spoon.
We are making these Idli in Microwave. We have this microwave safe idli maker. It it like a steamer, where you put water at the bottom tub and place the idli stand on the top one. The steam will come out of these tiny holes and will cook our Idli.
Fill half a glass of water and pre-heat this for 1 minute. So that our water is heated when we will place the Idlis.
Grease the idli stand.
For White Idli :
Take one part of the batter / one bowl.
Add 1/4 teaspoon eno / fruit salt and mix it well.
Grease the idli stand with oil and pour idli batter.
Place it on top of the idli maker and microwave it on high temperature for about 8 minutes.
Once 8 minutes are over, you will see Idlis have leave the sides.
Using a tooth-pick check if its cooked or not.
Remove the idlis.
For Green Idlis :
Firstly prepare green chutney. For that, in a mixer blender jar – take fresh coriander leaves, grated ginger, jeera, green chilies and a little bit of water.
Blend it well and take out in a bowl.
Add lemon juice and salt to taste. Our green chutney is ready.
Now take the second batch of the batter and add 2-3 tablespoons of green chutney. It totally depends on the colour you want.
Add 1/2 teaspoon eno, mix well and instantly pour into the greased idli maker.
Microwave it for 8 minutes.
Once done, check using a toothpick and take them out.
It’s very important to add eno at the end, otherwise it won’t come soft.
For Saffron Idli
Take the last batch / bowl of the batter and add saffron / orange color to it.
Add grated carrots and little color.
Mix the colour well and add 1/2 teaspoon of eno.
Mix it and instantly pour into the greased idli stand.
Microwave it for 8 minutes. Once done, check using a toothpick.

Notes :

  • Add eno only before you are going to microwave it. Don’t add it all together. Add one by one before steaming the idlis.
  • Add carrot puree instead of orange colour. In all you may avoid food colours. Totally depends on the colour you may like.
  • Can serve it with coconut chutney.

May you all enjoy these yummy and healthy treat this Independence Day.

And yes friends we remember the yummy treat is still pending as promised. Its coming to you soon 😉


Stay Connected!!!

Jai Hind

Sakshi n Parul

Celebrating Womanhood, Girl Power, Life, Aspirations – Yummy treat is on the way :)


Hey guys don’t wait, just play it !!!

This International Women’s Day ie 8th of March 2018 Parul launched her first music video sharing a beautiful message as you all must have seen by now. I feel so proud and it is just wonderful. This post is truly a surprise for her. Of course we are connected via food here but as our bond stands old and strong now, It is my pleasure to share here. Also it truly celebrates Woman hood, Girl power like on 8th March each year, today, each day. More power to Us 😉

I am sure you all will love her this effort as much as I did and others are appreciating. The figures talks it all. If you like it please do subscribe to her channel and also spread the word.

And of course I won’t just leave you on that. To celebrate the same we are definitely coming up with something to satiate your sweet tooth 🙂 So until then enjoy the video and lets shout it out ” Life Has Started Now “. I am in love with the song.


Stay connected for a yummy treat coming your way!!!

Cheers!!!

Sakshi n Parul


GUJIA: Happy Holi

Holi hai

To start with don’t forget to go through our Granny’s legendary tips: https://www.facebook.com/missfoodies101/posts/922526927863506

We are sure they will help in playing a colourful and safe Holi 🙂

What we have on our menu today is a must have and super famous dish around this festival. As our naughty munchkins are growing big, they are getting even stronger taste buds. So we need to treat them with the most called for sweet on Holi. Gujia 🙂

For those who don’t know much about it , here’s a brief:
Gujia is a sweet dumpling made with suji or Maida flour wheat flour and stuffed with khoya. It is common in southern regions of Asia Pakistan, Bangladesh and India.
The packaging of a gujia is very much like that of a samosa, however the gujia has a very distinct shape. The gujhia is filled with a mixture of grated and roasted dry fruits, khoya, coconuts and to add a grainy texture, a little suji (coarse ground wheat flour or semolina).

Now today’s dish is definitely close to our hearts as it comes straight from the kitchen of our mommies and grandmommies. Not just the recipe but also with all their love and warmth. Sakshi made sure that her mom and grand Mom is on the task while we move around to get you these beautiful clicks 😉

So we seem to be drooling over these and so do our kids. While we dive into the ocean of gujias this Holi you take a look on this yummy recipe straight from our Mom’s kitchen 😀

INGREDIENTS
For the Dough:
1kg Refined flour
200g Refined oil
Water
For the filling:
1/2 kg Khoya
400g powdered sugar
50g Chironji
100g Melon seeds
100g grated coconut
Making gujia pastry:
  1. Take the all purpose flour in a bowl.
  2. Heat ghee in a small pan or bowl. Pour the ghee on the flours.
  3. Rub the ghee with the flours, with your fingertips to form a bread crumb like texture.
  4. Then add water in parts and begin to knead. The amount of water needed will depend on the quality and texture of the flour.
  5. Knead the dough till firm. cover the dough with a moist cloth and keep aside for 30 minutes.
 
Making gujia stuffing:
  1. Crumble and grate the khoya/mawa.
  2. Put a pan in low flame and add the crumbled or grated khoya.
  3. Stir the khoya continuously on a low heat.
  4. cook the khoya, till it begins to gather around itself. Switch off the flame and keep the pan down. Let the khoya stuffing cool down completely.
  5. Then add powdered sugar, grated coconut, melon seeds and Chironji seeds. Better to seive the powdered sugar if there are lumps.
  6. Mix everything well and keep the stuffing aside. Check the taste and add more sugar if you prefer.
Assembling and Making gujia:
 
  1. Divide the dough into two parts.
  2. Make a medium log of each part and slice it into equal parts.
  3. Roll each part in your palms to make balls and place all the balls in the same bowl. Cover with a moist kitchen towel.
  4. Roll each ball with the rolling pin to a small circle having 4 to 5 inches diameter.
  5. With your fingertip, apply water all over the circumference edge.
  6. Place about 1 tbsp or 1.5 tbsp of the khoya filling on one side of the circle, keeping edges empty. Don’t add too much of stuffing as then its difficult to shape them and the gujiya may break in the oil.
  7. Carefully, bring together both the edges and join. gently press the edges.
  8. It is best to make pleated design at the edges. This way the stuffing does not come out while frying and the gujias look good too. Just keep on folding and twisting the edges till the end.
  9. Prepare gujias this way and arrange them on a plate or tray. cover the guijyas with a moist napkin so that the dough does not dry out.
Frying:
  1. Heat oil for deep frying in a kadai or pan.
  2. First test the temperature of oil, before frying. Add a small piece of the dough in the oil. If the dough comes up gradually, then the oil is ready. If the dough sits at the bottom, the oil is still cold. If the piece of dough comes up briskly and quickly, the oil is too hot.
  3. Gently slide the gujiyas in oil. Just add a few pieces and don’t overcrowd at a time depending on the size of the pan/kadai, you can fry 4 to 5 gujias at a time.
  4. Turn them over carefully as fry the other side. Deep fry till the gujias have become golden.
  5. Drain on kitchen paper tissues. Fry mawa gujias this way and once they are cooled completely, store them in an air-tight box.

Happy Holi friends. May you have a colorful and foodie Holi 🙂

Cheers

Parul n Sakshi

Review: P L A Y G R O U N D – JW MARRIOTT

Hello peeps!! Hope all are doing great! So here we are to bring in the New Year 2018 in style 🙂
Guess what? We were invited by JW Marriott at the inaugural of their new set up called Playground! We were delighted to accept the offer and it’s our pleasure to write  a review for them!
Playground boasts of its main elements – New York inspired Street Art by Delhi Street Art, Eclectic Music, Small Plates Menu, city’s most chic speakeasy space which is accessible by invitation only, classic cocktails, full leather loungers designed by Timothy Oulton
& The Food Truck, Playground offers unforgettable experiences to its guests.
The space is apt for day time meetings and by the evening you can unwind with over 40 brands of fine crafted beers and our signature cocktails curated especially by our Expatriate Mixologist from Tel Aviv, Tzvika Furman.
Coming on to the most exciting part “ The Brunch.” They has curated a special menu including their signature dishes and it was just wow. Though we are vegetarian and could not try most of the dishes but our friends were really praising everything. They got everything on the menu one after the other.
The very first thing on the table was the Artisinal Burrata! It was an amazing dish and presented just beautifully.
Balik Salmon was the next wonderful dish on our table! We can just say that it looked beautiful and tempting, got some amazing reviews from our counterparts. It was a clean plate within seconds.You need to visit and try this dish.
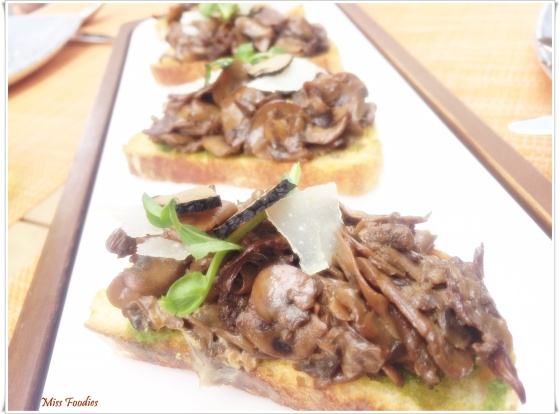
Tapas succeeded quickly and it looked satiating. The mushrooms on the cibatta were full of flavours with the perfect amount of truffle oil. Not a big fan of mushrooms but this was appetising.

Gambas Al Ajillo was next on the menu. As tricky as the name is but the dish looked simple with pink prawns.
We would get excited seeing a vegetarian dish coming our way. This time it was the Falafal Sliders. They were camouflaged as  mini burgers but a creative way of presenting a kind of mezze platter. My mouth is all watery as am writing about it. It’s a must try dish on the menu. Loved the chickpea cake and the Lebanese salad.
Coolers of course were a part of our appetising meal. Here’s a glimpse. We could give away the names easily but why not leave it for you guys to guess. Also better plan a visit to try them on. They were quite refreshing and fitting in perfect welcoming the summer season.
Then came the purple potato croquetas. Unfortunately the last vegetarian dish on the menu. These were exciting by the name but fine to taste. We would have loved a little more flavour in them but over all decent. But what stood out for us was the yogurt tahini dip that came on the side.
All in all a good experience. I fell for the food while Parul couldn’t stop admiring the ambience. Also the hospitality is definitely pulling us to visit them again soon and we believe you should too.
Until next time we leave you with as they say
                                     The world is your
                                       PLAYGROUND
                                        is your world 😉
Cheers!!!
Sakshi n Parul

Pan dulce :) Feliz Navidad

Merry Christmas friends. This post is pretty special as the recipe comes from our very own kitchen from our very own cook chef named Suresh. Yes friends Parul is super lucky to have a great and hard working  cook chef who cooks some delicious food like everyday. No wonder it is getting harder for her to loose weight, lol. Before she gets on to me let me introduce you to this yummy dish. Parul has named it as Pan dulce which simply means sweet bread. The dish is pretty simple but i love the fancy name touch to it. It can be made easily from ingredients left out in your kitchen, yet delicious and satiating.

As we always say Christmas is all about spreading love and joy. All about being a santa for someone. We hereby thank cook chef Suresh and many others who be a santa for us in their own way. Also we should learn and be a santa for someone in need and spread love and happiness. We dedicate this post to him and here we present to you the Cook Chef Suresh himself with his quick and yummy recipe straight from his kitchen:

We bet your guests will call out for more. Kids will love it and you can get it all ready in no time. Perfect for a festive season when you get all busy and yet need some delicious and super quick cooking ideas.

Wish you all a very merry Christmas and a happy new year 🙂  May the New Year bring in some more food food and food 😉 Story of our lives!!!

Cheers!!!

Parul n Sakshi

POPSICLES :) Watermelon & Kiwi , Yoghurt Choco chip

Look who’s turning 1. Our youngest mussfoodie family memeber and the cutest one indeed. Yes you guessed it, it’s Nyra’s 1st birthday and we are super duper freaked out!! Time just flies.

So for our special member we have something very special. All the kids enjoy them in all shapes and sizes. Yes you all guessed it, it is called the Popsicles!! Yummm..!! And the icing on the cake is that these are the healthier ones.. So let your kids just indulge in these colourful yet healthy home made lollies..

So on today’s menu we have three different types of popsicles for you!! They are just amazing and you don’t even have to count the calories you have consumed!! These are free calories and yet a perfect mood lifter..
So first is the watermelon popsicle.. It is the easiest and yet so satiating!! The red colour of it just attracts everyone and specially our kiddos!! Mommies don’t get stressed and let you kids have fun with these beautiful popsicles..

Next on our blog are the kiwi popsicles!! Let your kids call their friends for a day spend and boast about what their mommy is cooking!! These are tangy popsicle!! And we just love them!!

Yet another one is called Yoghurt choco chip popsicle!! Doesn’t that sound interesting!! It is indeed delicious as well!! You can do any amount of variations with this one!! Add a layer of granolas and another layer of banana to it, and it can be a perfect Sunday breakfast!!

So quickly look out for the super easy recipes below:

WATERMELON AND KIWI POPSICLES

Ingredients:
5 cups watermelon, puréed
5 medium kiwis, peeled and sliced

Method:
Place all the watermelon in the blender and process until smooth. Place kiwi slices in the mold and fill popsicles well with the watermelon juice. Insert popsicles stick and let it freeze until solid.
If the watermelon is not at its peak and lacking some sweetness, add powdered sugar at the time until preferred sweetness is achieved.

 Notes:
Just be creative and make as many different popsicles as you can.
We added grated coconut to watermelon juice and then put it for freezing.
You can add chopped pieces of watermelon/ kiwi.

Kiwi popsicles

Ingredients:
6 Kiwi, peeled and puréed
1/2 cup Coconut water
Sugar as per requirement

Method:
Purée the kiwis in a blender and add the coconut water to get the desired consistency. Do not make it too watery.
Add powdered sugar as per the taste.
Fill the molds with the purée and refrigerate it overnight.

Notes:
You can also add chopped kiwis/ watermelon to the kiwi purée.

YOGHURT CHOCO CHIP POPSICLES

Ingredients:
4 cup yoghurt ( vanilla, coffee)
Mini choco chips

Method:
Divide the yogurt among 8 5 ounce molds. Sprinkle with chocolate chips. Cover each mold with a piece of foil, sealing the edges. Make a small slit in the centre of the foil and insert a wooden freezer pop stick. Freeze for at least 8 hours and upto 3 days. Put the mold under running water to take out the popsicle.

Notes:
To make chocolate hazelnut yogurt, stir Nutella into vanilla yogurt.
Partially fill the mold with one type of yogurt and freeze for 30 mins. Add additional layer freezing for 30 mins each.

With that we will bid adieu until next time!! Lots of preparations and celebration for the birthday!! Lots of love and good health and a long life to our cutest princess Nyra!! Wish her all the luck in life!!

Cheers!!!

Sakshi n Parul